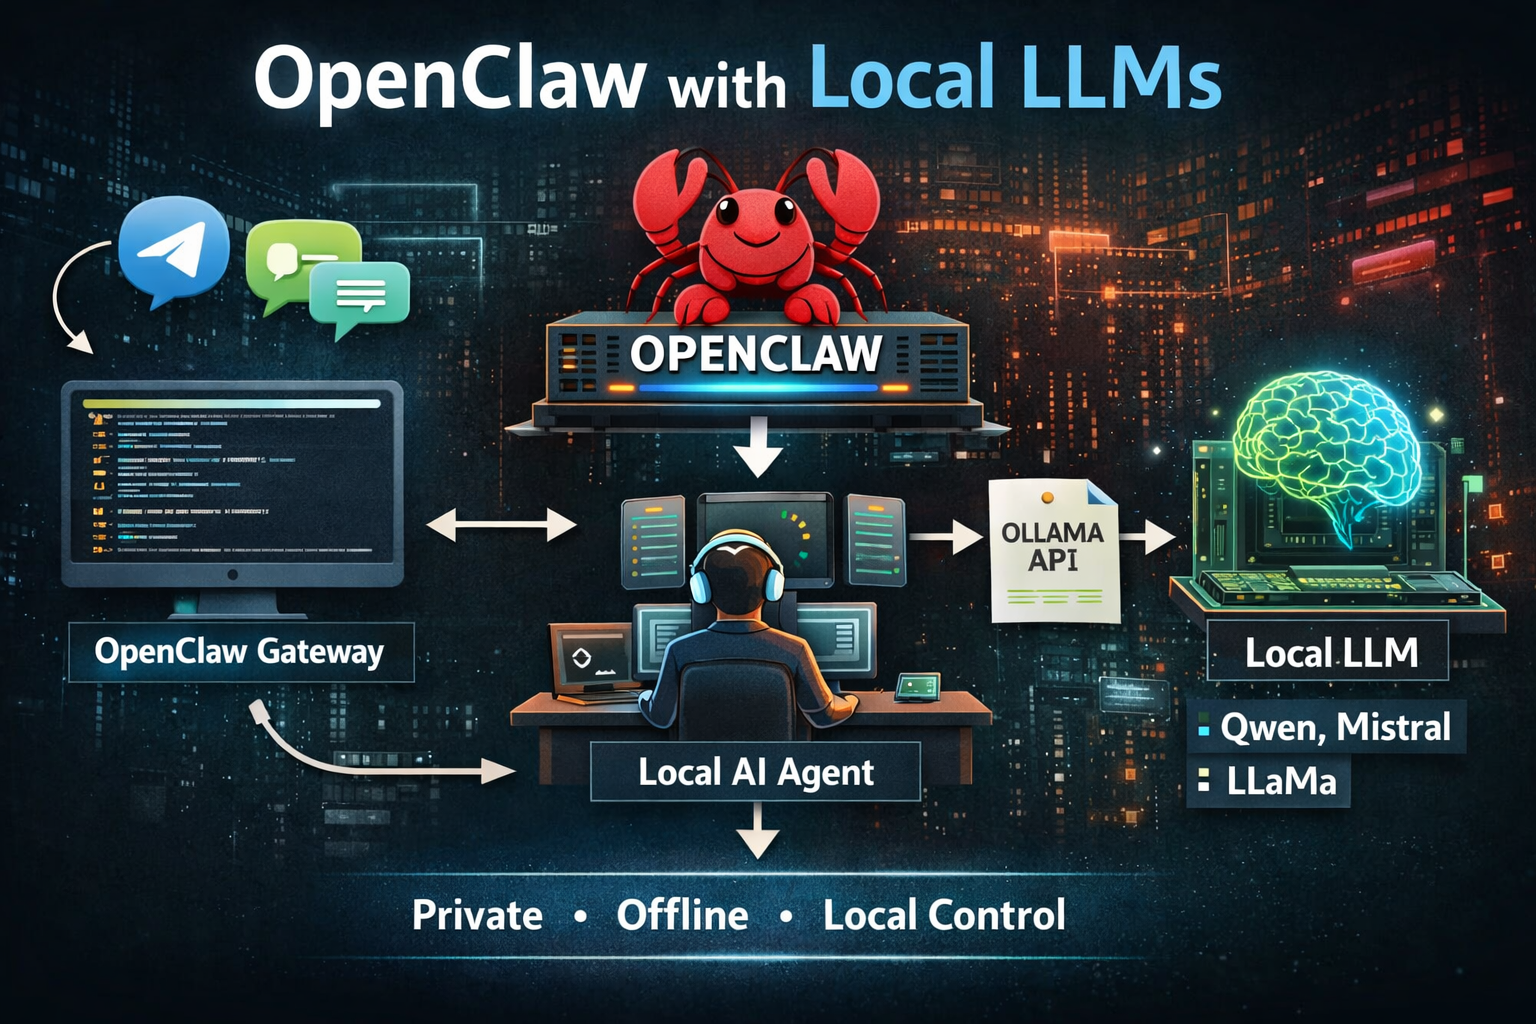
OpenClaw + Local LLMs: Running Your Own AI Agent in a Homelab
I finally found some time again to work on my OpenClaw + local LLM project.
Last time I tried connecting OpenClaw to LM Studio on both my Mac and Windows PC. At first everything worked surprisingly well — but only for a few minutes. After that things started to fall apart.
It seems the problem was the growing context history. Every time the agent sends a request to the local LLM, the entire conversation context is included. The longer the session runs, the more context needs to be processed. Eventually this makes responses slower and slower until the agent starts timing out repeatedly.
Needless to say, that was pretty frustrating.
Still, I didn’t want to give up on the idea.
Today, while working on a small vibe-coding project, I caught myself doing something very familiar: copy-pasting my code into ChatGPT, applying the suggested fixes, testing them locally, and then repeating the whole process again and again.
That’s when it clicked.
This is exactly the kind of workflow that OpenClaw should be perfect for. Maybe the problem before wasn’t the concept itself, but simply the model I used. A smaller LLM optimized for coding might actually work much better.
So… why not give it another try? 😸
If you remember from my last post, I installed OpenClaw inside a small Ubuntu VM running on my Proxmox homelab server. At the time I had configured sudo to require a password.
This time I decided to remove those chains and allow passwordless sudo instead.
After running a few tests it became obvious that my previous configuration was already pretty messy. Rather than trying to fix every little detail, I decided to start fresh.
Ollama instead of LM Studio
This time I also decided to switch from LM Studio to Ollama.
Ollama is very easy to install on Windows. You can simply paste the following command into a PowerShell window:
irm https://ollama.com/install.ps1 | iexOne nice thing about Ollama is that it does not require WSL, which keeps the setup simple.
In my case I had to follow this very helpful blog post.
This was necessary to make Ollama work properly with my AMD RX 9070 XT, since the card is not yet supported completely out of the box. Fortunately the process only took a couple of minutes and was really not rocket science.
Once Ollama is installed, open the Ollama Settings and make sure that “Expose Ollama over the network” is enabled.

By doing so, Ollama will listen not only on localhost but also on the network interface, allowing other machines — for example the OpenClaw VM running in your homelab — to access the local LLM.
(Re)Install OpenClaw
Next I simply uninstalled OpenClaw, deleted my .openclaw directory to get a completely clean setup, and ran the installer once again.
openclaw uninstall --workspace
npm uninstall -g openclaw
rm -rf .openclaw
curl -fsSL https://openclaw.ai/install.sh | bash
It’s really impressive how quickly this project is evolving. The last time I ran the installer the onboarding looked quite different and required a bit more manual setup.
Now the process feels much more polished. Connecting OpenClaw to local LLM providers like Ollama has become significantly easier, and the installer walks you through most of the configuration automatically.
OpenClaw Installer Output
ubuntu@openclaw:~$ curl -fsSL https://openclaw.ai/install.sh | bash
🦞 OpenClaw Installer
I'll refactor your busywork like it owes me money.
✓ Detected: linux
Install plan
OS: linux
Install method: npm
Requested version: latest
[1/3] Preparing environment
✓ Node.js v22.22.1 found
· Active Node.js: v22.22.1 (/usr/bin/node)
· Active npm: 10.9.4 (/usr/bin/npm)
[2/3] Installing OpenClaw
✓ Git already installed
· Installing OpenClaw v2026.3.13
✓ OpenClaw npm package installed
✓ OpenClaw installed
[3/3] Finalizing setup
· Refreshing loaded gateway service
✓ Gateway service metadata refreshed
✗ Restarting gateway service failed — re-run with --verbose for details
Restarted systemd service: openclaw-gateway.service
Timed out after 60s waiting for gateway port 18789 to become healthy.
Service runtime: status=stopped, state=activating, lastExit=1
Gateway port 18789 status: free.
Gateway restart timed out after 60s waiting for health checks.
! Gateway service restart failed; continuing
🦞 OpenClaw installed successfully (OpenClaw 2026.3.13 (61d171a))!
Home sweet home. Don't worry, I won't rearrange the furniture.
· Config already present; running doctor
· Running doctor to migrate settings
✓ Doctor complete
· Config already present; skipping onboarding
· Starting setup
🦞 OpenClaw 2026.3.13 (61d171a) — You had me at 'openclaw gateway start.'
▄▄▄▄▄▄▄▄▄▄▄▄▄▄▄▄▄▄▄▄▄▄▄▄▄▄▄▄▄▄▄▄▄▄▄▄▄▄▄▄▄▄▄▄▄▄▄▄▄▄▄▄
██░▄▄▄░██░▄▄░██░▄▄▄██░▀██░██░▄▄▀██░████░▄▄▀██░███░██
██░███░██░▀▀░██░▄▄▄██░█░█░██░█████░████░▀▀░██░█░█░██
██░▀▀▀░██░█████░▀▀▀██░██▄░██░▀▀▄██░▀▀░█░██░██▄▀▄▀▄██
▀▀▀▀▀▀▀▀▀▀▀▀▀▀▀▀▀▀▀▀▀▀▀▀▀▀▀▀▀▀▀▀▀▀▀▀▀▀▀▀▀▀▀▀▀▀▀▀▀▀▀▀
🦞 OPENCLAW 🦞
┌ OpenClaw onboarding
│
◇ Security ─────────────────────────────────────────────────────────────────────────────────╮
│ │
│ Security warning — please read. │
│ │
│ OpenClaw is a hobby project and still in beta. Expect sharp edges. │
│ By default, OpenClaw is a personal agent: one trusted operator boundary. │
│ This bot can read files and run actions if tools are enabled. │
│ A bad prompt can trick it into doing unsafe things. │
│ │
│ OpenClaw is not a hostile multi-tenant boundary by default. │
│ If multiple users can message one tool-enabled agent, they share that delegated tool │
│ authority. │
│ │
│ If you’re not comfortable with security hardening and access control, don’t run │
│ OpenClaw. │
│ Ask someone experienced to help before enabling tools or exposing it to the internet. │
│ │
│ Recommended baseline: │
│ - Pairing/allowlists + mention gating. │
│ - Multi-user/shared inbox: split trust boundaries (separate gateway/credentials, ideally │
│ separate OS users/hosts). │
│ - Sandbox + least-privilege tools. │
│ - Shared inboxes: isolate DM sessions (session.dmScope: per-channel-peer) and keep │
│ tool access minimal. │
│ - Keep secrets out of the agent’s reachable filesystem. │
│ - Use the strongest available model for any bot with tools or untrusted inboxes. │
│ │
│ Run regularly: │
│ openclaw security audit --deep │
│ openclaw security audit --fix │
│ │
│ Must read: https://docs.openclaw.ai/gateway/security │
│ │
├────────────────────────────────────────────────────────────────────────────────────────────╯
│
◇ I understand this is personal-by-default and shared/multi-user use requires lock-down. Continue?
│ Yes
│
◇ Onboarding mode
│ QuickStart
│
◇ Existing config detected ──╮
│ │
│ No key settings detected. │
│ │
├─────────────────────────────╯
│
◇ Config handling
│ Reset
│
◇ Reset scope
│ Full reset (config + creds + sessions + workspace)
Failed to move to Trash (manual delete): ~/.openclaw/openclaw.json
│
◇ QuickStart ─────────────────────────╮
│ │
│ Gateway port: 18789 │
│ Gateway bind: Loopback (127.0.0.1) │
│ Gateway auth: Token (default) │
│ Tailscale exposure: Off │
│ Direct to chat channels. │
│ │
├──────────────────────────────────────╯
│
◇ Model/auth provider
│ Ollama
│
◇ Ollama base URL
│ http://meangreenone.fritz.box:11434
│
◇ Ollama mode
│ Cloud + Local
│
◇ Model configured ────────────────────────────╮
│ │
│ Default model set to ollama/kimi-k2.5:cloud │
│ │
├───────────────────────────────────────────────╯
│
◇ Default model
│ ollama/qwen2.5:7b
│
◇ Channel status ────────────────────────────╮
│ │
│ Telegram: needs token │
│ WhatsApp (default): not linked │
│ Discord: needs token │
│ Slack: needs tokens │
│ Signal: needs setup │
│ signal-cli: missing (signal-cli) │
│ iMessage: needs setup │
│ imsg: missing (imsg) │
│ IRC: not configured │
│ Google Chat: not configured │
│ LINE: not configured │
│ Feishu: install plugin to enable │
│ Google Chat: install plugin to enable │
│ Nostr: install plugin to enable │
│ Microsoft Teams: install plugin to enable │
│ Mattermost: install plugin to enable │
│ Nextcloud Talk: install plugin to enable │
│ Matrix: install plugin to enable │
│ BlueBubbles: install plugin to enable │
│ LINE: install plugin to enable │
│ Zalo: install plugin to enable │
│ Zalo Personal: install plugin to enable │
│ Synology Chat: install plugin to enable │
│ Tlon: install plugin to enable │
│ │
├─────────────────────────────────────────────╯
│
◇ How channels work ───────────────────────────────────────────────────────────────────────╮
│ │
│ DM security: default is pairing; unknown DMs get a pairing code. │
│ Approve with: openclaw pairing approve ││ Public DMs require dmPolicy="open" + allowFrom=["*"]. ││ Multi-user DMs: run: openclaw config set session.dmScope "per-channel-peer" (or ││ "per-account-channel-peer" for multi-account channels) to isolate sessions. ││ Docs: channels/pairing ││ ││ Telegram: simplest way to get started — register a bot with @BotFather and get going. ││ WhatsApp: works with your own number; recommend a separate phone + eSIM. ││ Discord: very well supported right now. ││ IRC: classic IRC networks with DM/channel routing and pairing controls. ││ Google Chat: Google Workspace Chat app with HTTP webhook. ││ Slack: supported (Socket Mode). ││ Signal: signal-cli linked device; more setup (David Reagans: "Hop on Discord."). ││ iMessage: this is still a work in progress. ││ LINE: LINE Messaging API webhook bot. ││ Feishu: 飞书/Lark enterprise messaging with doc/wiki/drive tools. ││ Nostr: Decentralized protocol; encrypted DMs via NIP-04. ││ Microsoft Teams: Bot Framework; enterprise support. ││ Mattermost: self-hosted Slack-style chat; install the plugin to enable. ││ Nextcloud Talk: Self-hosted chat via Nextcloud Talk webhook bots. ││ Matrix: open protocol; install the plugin to enable. ││ BlueBubbles: iMessage via the BlueBubbles mac app + REST API. ││ Zalo: Vietnam-focused messaging platform with Bot API. ││ Zalo Personal: Zalo personal account via QR code login. ││ Synology Chat: Connect your Synology NAS Chat to OpenClaw with full agent capabilities. ││ Tlon: decentralized messaging on Urbit; install the plugin to enable. ││ │├───────────────────────────────────────────────────────────────────────────────────────────╯│◇ Select channel (QuickStart)│ Telegram (Bot API)│◇ Telegram bot token ───────────────────────────────────────────────────────────────────╮│ ││ 1) Open Telegram and chat with @BotFather ││ 2) Run /newbot (or /mybots) ││ 3) Copy the token (looks like 123456:ABC...) ││ Tip: you can also set TELEGRAM_BOT_TOKEN in your env. ││ Docs: https://docs.openclaw.ai/telegram ││ Website: https://openclaw.ai ││ │├────────────────────────────────────────────────────────────────────────────────────────╯│◇ How do you want to provide this Telegram bot token?│ Enter Telegram bot token│◇ Enter Telegram bot token│ XXXXXX│◇ Selected channels ────────────────────────────────────────────────────────────────────────────────╮│ ││ Telegram — simplest way to get started — register a bot with @BotFather and get going. ││ https://docs.openclaw.ai/channels/telegram ││ https://openclaw.ai ││ │├────────────────────────────────────────────────────────────────────────────────────────────────────╯Config overwrite: /home/ubuntu/.openclaw/openclaw.json (sha256 7be04d22863f1460f8951af800bffd08665f4e199e335da2eaacd34a26f58385 -> d61777bbff67f352c88ffe22131b92a246c286df844282c358485b7530c7486c, backup=/home/ubuntu/.openclaw/openclaw.json.bak)Updated ~/.openclaw/openclaw.jsonWorkspace OK: ~/.openclaw/workspaceSessions OK: ~/.openclaw/agents/main/sessions│◇ Web search ────────────────────────────────────────╮│ ││ Web search lets your agent look things up online. ││ Choose a provider and paste your API key. ││ Docs: https://docs.openclaw.ai/tools/web ││ │├─────────────────────────────────────────────────────╯│◇ Search provider│ Skip for now│◇ Skills status ─────────────╮│ ││ Eligible: 9 ││ Missing requirements: 36 ││ Unsupported on this OS: 7 ││ Blocked by allowlist: 0 ││ │├─────────────────────────────╯│◇ Configure skills now? (recommended)│ Yes│◇ Install missing skill dependencies│ 📰 blogwatcher│◇ Installed blogwatcher│◇ Set GOOGLE_PLACES_API_KEY for goplaces?│ No│◇ Set GEMINI_API_KEY for nano-banana-pro?│ No│◇ Set NOTION_API_KEY for notion?│ No│◇ Set OPENAI_API_KEY for openai-image-gen?│ No│◇ Set OPENAI_API_KEY for openai-whisper-api?│ No│◇ Set ELEVENLABS_API_KEY for sag?│ No│◇ Hooks ──────────────────────────────────────────────────────────────────╮│ ││ Hooks let you automate actions when agent commands are issued. ││ Example: Save session context to memory when you issue /new or /reset. ││ ││ Learn more: https://docs.openclaw.ai/automation/hooks ││ │├──────────────────────────────────────────────────────────────────────────╯│◇ Enable hooks?│ 🚀 boot-md, 📎 bootstrap-extra-files, 📝 command-logger, 💾 session-memory│◇ Hooks Configured ────────────────────────────────────────────────────────────────╮│ ││ Enabled 4 hooks: boot-md, bootstrap-extra-files, command-logger, session-memory ││ ││ You can manage hooks later with: ││ openclaw hooks list ││ openclaw hooks enable ││ openclaw hooks disable ││ │├───────────────────────────────────────────────────────────────────────────────────╯Config overwrite: /home/ubuntu/.openclaw/openclaw.json (sha256 d61777bbff67f352c88ffe22131b92a246c286df844282c358485b7530c7486c -> 53a7fa080c6a285a847a579d11e1445796cf81794f2735c9fc43f933ec47643a, backup=/home/ubuntu/.openclaw/openclaw.json.bak)│◇ Gateway service runtime ────────────────────────────────────────────╮│ ││ QuickStart uses Node for the Gateway service (stable + supported). ││ │├──────────────────────────────────────────────────────────────────────╯│◇ Gateway service already installed│ Reinstall│◑ Uninstalling Gateway service…Removed systemd service: /home/ubuntu/.config/systemd/user/openclaw-gateway.service◇ Gateway service uninstalled.│◐ Installing Gateway service…Installed systemd service: /home/ubuntu/.config/systemd/user/openclaw-gateway.service◇ Gateway service installed.│◇Telegram: configuredAgents: main (default)Heartbeat interval: 30m (main)Session store (main): /home/ubuntu/.openclaw/agents/main/sessions/sessions.json (0 entries)│◇ Optional apps ────────────────────────╮│ ││ Add nodes for extra features: ││ - macOS app (system + notifications) ││ - iOS app (camera/canvas) ││ - Android app (camera/canvas) ││ │├────────────────────────────────────────╯│◇ Control UI ─────────────────────────────────────────────────────────────────────╮│ ││ Web UI: http://127.0.0.1:18789/ ││ Web UI (with token): ││ http://127.0.0.1:18789/#token=XXXXXXX││ Gateway WS: ws://127.0.0.1:18789 ││ Gateway: reachable ││ Docs: https://docs.openclaw.ai/web/control-ui ││ │├──────────────────────────────────────────────────────────────────────────────────╯│◇ Start TUI (best option!) ─────────────────────────────────╮│ ││ This is the defining action that makes your agent you. ││ Please take your time. ││ The more you tell it, the better the experience will be. ││ We will send: "Wake up, my friend!" ││ │├────────────────────────────────────────────────────────────╯│◇ Token ────────────────────────────────────────────────────────────────────────────────────╮│ ││ Gateway token: shared auth for the Gateway + Control UI. ││ Stored in: ~/.openclaw/openclaw.json (gateway.auth.token) or OPENCLAW_GATEWAY_TOKEN. ││ View token: openclaw config get gateway.auth.token ││ Generate token: openclaw doctor --generate-gateway-token ││ Web UI keeps dashboard URL tokens in memory for the current tab and strips them from the ││ URL after load. ││ Open the dashboard anytime: openclaw dashboard --no-open ││ If prompted: paste the token into Control UI settings (or use the tokenized dashboard ││ URL). ││ │├────────────────────────────────────────────────────────────────────────────────────────────╯│◇ How do you want to hatch your bot?│ Hatch in TUI (recommended)openclaw tui - ws://127.0.0.1:18789 - agent main - session main
session agent:main:main
Wake up, my friend!
No_reply
Pre-compaction memory flush. Store durable memories only in memory/2026-03-14.md (create memory/ if needed). Treat workspace bootstrap/reference files such as MEMORY.md, SOUL.md, TOOLS.md, and AGENTS.md as read-only during this flush; never overwrite, replace, or edit them. If memory/2026-03-14.md already exists, APPEND new content only and do not overwrite existingentries. Do NOT create timestamped variant files (e.g., 2026-03-14-HHMM.md); always use the canonical 2026-03-14.md filename. If nothing to store, reply with NO_REPLY.Current time: Saturday, March 14th, 2026 — 5:38 PM (UTC) / 2026-03-14 17:38 UTC
No_reply
Hello! How can I assist you today?connected | press ctrl+c again to exitagent main | session main (openclaw-tui) | ollama/qwen2.5:7b | tokens 9.9k/33k (30%)───────────────────────────────────────────────────────────────────────────────────────────────────────────────────────────────────────────────────────────────────────────────────────────────────────────────────────────────────────────────────────────────────────────────────────────────────────────────────────────────────────────────────────────────────────────────────
───────────────────────────────────────────────────────────────────────────────────────────────────────────────────────────────────────────────────────────────────────────────────────────────────────────────────────────────────────────────────────────────────────────────────────────────────────────────────────────────────────────────────────────────────────────────────
ubuntu@openclaw:~$ openclaw pairing approve telegram B2GRPK67
🦞 OpenClaw 2026.3.13 (61d171a) — I don't just autocomplete—I auto-commit (emotionally), then ask you to review (logically).
│◇ Doctor warnings ──────────────────────────────────────────────────────────────────────────╮│ ││ - channels.telegram.groupPolicy is "allowlist" but groupAllowFrom (and allowFrom) is ││ empty — all group messages will be silently dropped. Add sender IDs to ││ channels.telegram.groupAllowFrom or channels.telegram.allowFrom, or set groupPolicy to ││ "open". ││ │├────────────────────────────────────────────────────────────────────────────────────────────╯Approved telegram sender 8276830768.
This time I simply selected “Ollama” as the model provider and entered the URL of my Windows host where Ollama is running.
Next, I created a new Telegram bot using @BotFather and pasted the bot token into the OpenClaw setup wizard. After completing the onboarding process, I approved the pairing request in OpenClaw so the agent could communicate with my Telegram account.
Choosing the Right LLM
Last time I got really frustrated because after just a few minutes of chatting the bot became unresponsive. Changing models and adjusting the context size quickly turned into a nightmare.
What I eventually realized is that one thing is really important when running local models: the LLM should ideally fit completely into your GPU memory.
If the model spills over into system RAM, inference becomes much slower because the GPU and CPU constantly have to move data back and forth.
For a 16 GB GPU, models like GPT-OSS or Qwen 2.5 are a very good choice. They are small enough to run efficiently while still being capable enough to handle many everyday tasks. With these models the responses are noticeably faster and the overall experience becomes much smoother.
That said, it’s important not to expect miracles. A local LLM is not comparable to a large cloud-based model. The difference is a bit like comparing a small house to a skyscraper.
But even a small house can be very useful. Local models are perfect for simple coding tasks, automation, quick explanations, and many everyday questions. And perhaps most importantly: they can save you quite a bit on your token bill.
You can check which models are currently configured by running:
openclaw models listIn my case the output looked like this:
ubuntu@openclaw:~$ openclaw models list

🦞 OpenClaw 2026.3.13 (61d171a) — Your second brain, except this one actually remembers where you left things.

Model                                      Input      Ctx      Local Auth  Tags
ollama/qwen2.5:7b                          text       32k      no    yes   default,configured,alias:qwen2.5
ollama/kimi-k2.5:cloud                     text       125k     no    yes   configured
ollama/gpt-oss:20b                         text       128k     no    yes   configured,alias:gpt
ubuntu@openclaw:~$
One thing to keep in mind is the context size of the model. For example, gpt-oss:20b uses a default context window of 128k tokens.
While this sounds great in theory, it can be problematic when running locally on hardware with limited GPU memory. Larger context windows require significantly more VRAM for the KV cache, which can slow things down or even cause the model to fall back to system memory.
You can easily check how the model is currently running using Ollama:
PS C:\Users\olive> ollama ps
NAME           ID              SIZE     PROCESSOR          CONTEXT    UNTIL
gpt-oss:20b    17052f91a42e    17 GB    23%/77% CPU/GPU    131072     4 minutes from now
In this example you can see that 77% of the model runs on the GPU while 23% runs on the CPU, which usually means the model does not fully fit into GPU memory. This is often a sign that reducing the context size or switching to a slightly smaller model may improve performance.
For a 16 GB GPU, a context size of 100k tokens or less is usually a safer choice. In many cases you can even reduce it further without losing much functionality.
Create Aliases for your LLMs
A very useful tip if you plan to experiment with different models is to define aliases for them in the .openclaw/openclaw.json file.
This makes it much easier to switch between models without constantly editing the full model name in your configuration.
 "agents": {
    "defaults": {
      "model": {
        "primary": "ollama/qwen2.5:7b"
      },
      "models": {
        "ollama/kimi-k2.5:cloud": {},
        "ollama/qwen2.5:7b": {
          "alias":"qwen2.5"
        },
        "ollama/gpt-oss:20b": {
          "alias":"gpt"
        }
      },
      "workspace": "/home/ubuntu/.openclaw/workspace"
    }
  },
By doing this you can easily switch between models by simply typing /gpt in the TUI or in chat.
One important thing to keep in mind: whenever you modify the configuration file, you need to restart the OpenClaw gateway for the changes to take effect.
openclaw gateway restartWake Up, Mr. Freeman
If everything looks good, it's time to hatch our agent.
To start the OpenClaw interface, simply run:
openclaw tuiThis launches the text user interface (TUI) where you can interact directly with your agent, monitor its status, and start chatting with it through the connected channels.
Agent… Write My Code
Now that we have OpenClaw running with our local LLMs, it’s time to put it to the test.
For this experiment I wanted something simple but practical. The idea was to have the agent write a small script that scans my local subnet for active IP addresses and generates a report that I can easily browse later.
The goal was a script that:
- scans my subnet for reachable hosts
- collects the discovered IP addresses
- exports the results into a CSV file
- also generates a small HTML report that I can open in a browser to quickly look up the results
This is exactly the kind of task where an AI agent can shine. Instead of writing everything manually, I can simply describe what I want and let the agent generate the code for me.
So I asked the agent something along the lines of:
Write a script that scans my subnet for active IP addresses and generates both a CSV file and an HTML overview of the results.
Let’s see how it did.
Model Comparison
To get a better feeling for the differences between models, I ran the same prompt using two different LLMs.
Qwen2.5 (7B) (Response time: ~15 seconds)
/qwen2.5
Model reset to default (qwen2.5 (ollama/qwen2.5:7b)).
Write a script that scans my subnet for active IP addresses and generates both a CSV file and an HTML overview of the results.
Sure, I can help you with that. Below is a Bash script that will scan your subnet for active IP addresses and generate both a CSV file and an HTML overview of the results. Please replace 192.168.1.0/24 with your actual subnet.
#!/bin/bash
subnet="192.168.1.0/24"
output_csv="active_ips.csv"
output_html="active_ips.html"
# Function to ping and check if an IP is active
ping_ip() {
local ip=$1
if ping -q -c 1 -W 1 $ip &> /dev/null; then
echo $ip
fi
}
# Generate the CSV file
echo "IP Address" > $output_csv
for ip in $(seq 1 254); do
active_ip=$(ping_ip $subnet.$ip)
if [ -n "$active_ip" ]; then
echo "$active_ip" >> $output_csv
fi
done
# Generate the HTML file
echo "<html><body><h1>Active IPs</h1><table><tr><th>IP Address</th></tr>" > $output_html
for ip in $(cat $output_csv); do
echo "<tr><td>$ip</td></tr>" >> $output_html
done
echo "</table></body></html>" >> $output_html
echo "Scan completed. Results saved to $output_csv and $output_html."
To use this script:
- Save it to a file, for example, scan_subnet.sh.
- Make it executable: chmod +x scan_subnet.sh.
- Run the script: ./scan_subnet.sh.
This script uses ping to check if an IP address is active and then generates a CSV file and an HTML file with the results. Let me know if you need any further assistance!
Qwen quickly generated a simple Bash script that scans a /24 subnet using ping and exports the results to both CSV and HTML. The script was short and straightforward and worked well after only minimal adjustments.
The response was fast and perfectly usable for a quick task.
GPT-OSS (20B) (Response time: ~ 110 seconds)
/gpt
Model set to gpt (ollama/gpt-oss:20b).
Write a script that scans my subnet for active IP addresses and generates both a CSV file and an HTML overview of the results.
Below is a ready‑to‑run Bash script that:
- Scans a subnet for live hosts (using a single‑ping test).
- Writes the list of active IP addresses to active_ips.csv.
- Generates an easy‑to‑open active_ips.html summary page.
Replace the subnet variable with the network you want to probe (e.g. 192.168.1.0/24).
#!/usr/bin/env bash
# -------------------------------- -------------------------------- --
# scan_subnet.sh – Find live hosts in a subnet and output CSV + HTML
# -------------------------------- -------------------------------- --
# ----- CONFIGURATION -------------------------------- ----------------
# Change this to the subnet you want to scan.
# Accepts CIDR notation (e.g., 192.168.1.0/24)
subnet="192.168.1.0/24"
# Output file names
output_csv="active_ips.csv"
output_html="active_ips.html"
# Number of ping attempts per host (0‑3, higher = more reliable)
ping_attempts=1
# Ping timeout in seconds
ping_timeout=1
# ----- END CONFIG -------------------------------- -------------------
set -euo pipefail
# Resolve the base IP and netmask
IFS=/ read -r base_ip netmask <<< "$subnet"
# Convert CIDR mask to netmask in dotted quad
mask=$(
nmap --script ipscan --script-args ipscan.ip=$base_ip \
| awk '/Netmask/ {print $2}'
)
# Determine the starting and ending IPs in the subnet
start_ip=$base_ip
end_ip=$(ipcalc "$subnet" | grep Network | awk '{print $2}')
# Helper: Convert IP to integer
ip2int() {
local IFS=.
read -r a b c d <<< "$1"
echo $(( (a<<24) + (b<<16) + (c<<8) + d ))
}
# Helper: Convert integer to IP
int2ip() {
local ip=$1
printf "%d.%d.%d.%d" \
$(( (ip >> 24) & 0xff )) \
$(( (ip >> 16) & 0xff )) \
$(( (ip >> 8) & 0xff )) \
$(( ip & 0xff ))
}
# Build a list of IPs in the subnet (excluding network & broadcast)
ip_list=()
start_int=$(ip2int "$start_ip")
end_int=$(ip2int "$end_ip")
for ((i=start_int+1; i<end_int; i++)); do
ip_list+=("$(int2ip $i)")
done
# Function to check if an IP is alive
is_alive() {
local ip=$1
if ping -c "$ping_attempts" -W "$ping_timeout" -q "$ip" &>/dev/null; then
return 0
else
return 1
fi
}
# --------- Scan & Collect Results -------------------------------- -
echo "IP Address" > "$output_csv"
alive_hosts=()
for ip in "${ip_list[@]}"; do
if is_alive "$ip"; then
echo "$ip" >> "$output_csv"
alive_hosts+=("$ip")
fi
done
# --------- Generate HTML Overview -------------------------------- -
cat > "$output_html" <<EOF
<!DOCTYPE html>
<html lang="en">
<head>
<meta charset="UTF-8">
<title>Active IPs in $subnet</title>
<style>
body { font-family: Arial, sans-serif; margin: 20px; }
table { border-collapse: collapse; width: 50%; }
th, td { border: 1px solid #ddd; padding: 8px; text-align: left; }
th { background-color: #f2f2f2; }
</style>
</head>
<body>
<h1>Active IP Addresses in $subnet</h1>
<p>Found \${#alive_hosts[@]} active host(s).</p>
<table>
<tr><th>IP Address</th></tr>
EOF
for ip in "${alive_hosts[@]}"; do
echo " <tr><td>$ip</td></tr>" >> "$output_html"
done
cat >> "$output_html" <<EOF
</table>
</body>
</html>
EOF
echo "Scan complete. CSV: $output_csv HTML: $output_html"
How to Use
- Save the script as scan_subnet.sh.
- Make it executable:
chmod +x scan_subnet.sh
- Run it:
./scan_subnet.sh
The script will create two files in the current directory:
- active_ips.csv – simple CSV listing each live IP.
- active_ips.html – a nicely formatted web page you can open in any browser.
Feel free to tweak the ping_attempts or ping_timeout values if you need a more reliable scan on a slower network. Happy scanning!
connected | press ctrl+c again to exit
agent main | session main (openclaw-tui) | ollama/gpt-oss:20b | tokens 11k/100k (11%)
GPT-OSS produced a much longer and more elaborate script. It added additional helper functions, comments, and more flexible subnet handling. The output looked more polished, but the response took noticeably longer to generate.
Future Outlook
Now that the basic setup is working, I’m curious to see what else can be done with it. A few ideas that come to mind:
- Get notified when the washing machine is done
Our washing machine isn’t “smart”, but it is connected to a smart plug. Monitoring the power consumption could trigger a notification when the cycle finishes. - Get notified when a food delivery is about to arrive
The agent could monitor delivery tracking pages and send a message shortly before the driver arrives. - Monitor stocks and provide interesting tips
The agent could track certain stocks or news sources and report anything worth looking at. - Manage a virtual stock portfolio
Let the agent simulate trades and report profits and losses over time. If it performs well, it might be interesting to compare its decisions with my own trades.
Of course, all of this could also be scripted or implemented using tools like Home Assistant. But the interesting idea here is letting the agent figure out how to set these things up on its own.
Final Thoughts
Running an AI agent with local LLMs in your own homelab is still a bit of an experiment. Things change quickly, models evolve, and sometimes you have to tweak configurations more than you would like.
But once everything is running, it’s surprisingly powerful.
Instead of constantly copy-pasting code into a cloud service, waiting for responses, and worrying about token limits, you suddenly have something different: your own local AI assistant that can help with everyday tasks.
It won’t replace the massive cloud models anytime soon. The difference is still noticeable.
But a local setup still has some very real advantages:
- it’s always available — more or less 😄
- it runs entirely on your own hardware
- it costs nothing per request (well… except for your power bill)
- and you can integrate it directly into your own workflows
For tasks like scripting, automation, debugging, or experimenting with ideas, this kind of setup already works surprisingly well.
And perhaps the best part: it feels a bit like the early days of the homelab community again — experimenting, breaking things, fixing them, and learning along the way.
I’m curious to see where this space will be in a year.
For now, I’m just happy that I finally managed to get OpenClaw running reliably with local LLMs. 🦞🤖
Small Cheatsheet
Some useful commands I used while setting up and experimenting with OpenClaw.
# Help & orientation
openclaw --help
openclaw help
openclaw gateway --help
openclaw gateway call --help
openclaw sessions --help

# Gateway control
openclaw gateway start
openclaw gateway stop
openclaw gateway restart
openclaw gateway status

# Gateway status (JSON)
openclaw gateway call status --json
openclaw gateway call status --json | grep contextTokens
openclaw gateway call status --json | sed -n '1,120p'

# List sessions
openclaw sessions list
openclaw sessions list --json
openclaw sessions list --active 120

# Hard reset sessions (main agent)
openclaw gateway stop
rm -f ~/.openclaw/agents/main/sessions/*.jsonl
rm -f ~/.openclaw/agents/main/sessions/sessions.json
openclaw gateway start

# Config debugging
nl -ba ~/.openclaw/openclaw.json | sed -n '40,60p'
# common fix: missing comma after }
sed -i '47s/}/},/' ~/.openclaw/openclaw.json

openclaw doctor
openclaw doctor --fix

# Test LM Studio API
curl http://meangreenone:1234/v1/models

# Gateway token env
export OPENCLAW_GATEWAY_TOKEN="YOUR_TOKEN"